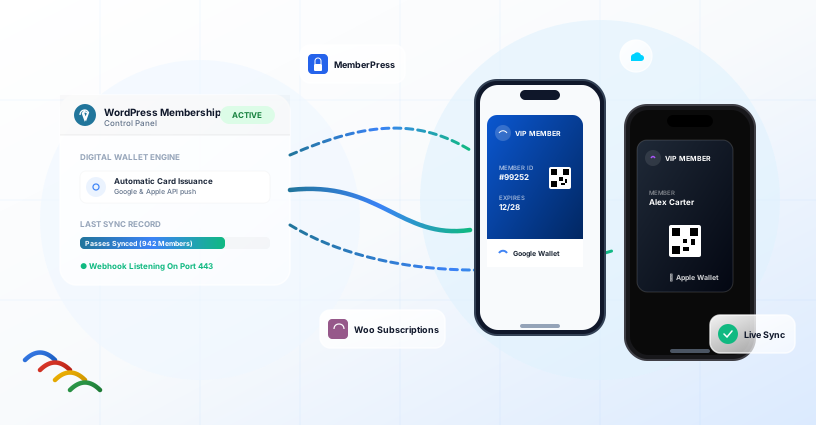
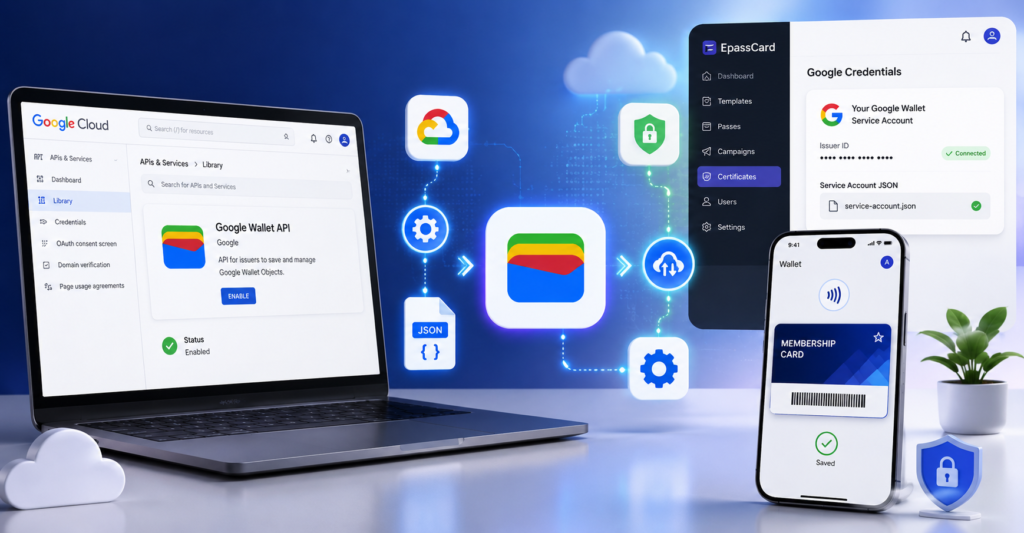
By default, EpassCard can create Google Wallet passes using the platform's shared Google service account. Many businesses prefer to issue passes from their own Google Wallet Issuer, so branding, ownership, and Google Console access stay under their company.
This guide walks you through the full setup:
- Enable Google Wallet API in Google Cloud
- Create a service account and download a JSON key
- Connect your Issuer ID in Google Pay & Wallet Console
- Grant the service account Developer access
- Upload credentials into EpassCard and select them on a pass template
When you finish, you can create Google Wallet passes under your Issuer instead of the shared platform account.
What you need before you start
| Item | Why you need it |
|---|---|
| Google account | Access to Cloud Console and Pay & Wallet Console |
| Google Cloud project | Hosts the Wallet API and service account |
| Google Pay & Wallet Issuer | Provides your Issuer ID |
| EpassCard org admin access | Permission to upload certificates / Google credentials |
You will upload two things into EpassCard:
- Issuer ID — numeric ID from Pay & Wallet Console (not inside the JSON file)
- Service account JSON — private key file from Google Cloud
Enable Google Wallet API (Google Cloud)
1Open Google Cloud and select a project
- Go to Google Cloud Console.
- Sign in with the Google account that will own this setup.
- Open the project picker at the top.
- Select an existing project, or click New project, name it (for example
epasscard-wallet), and create it.
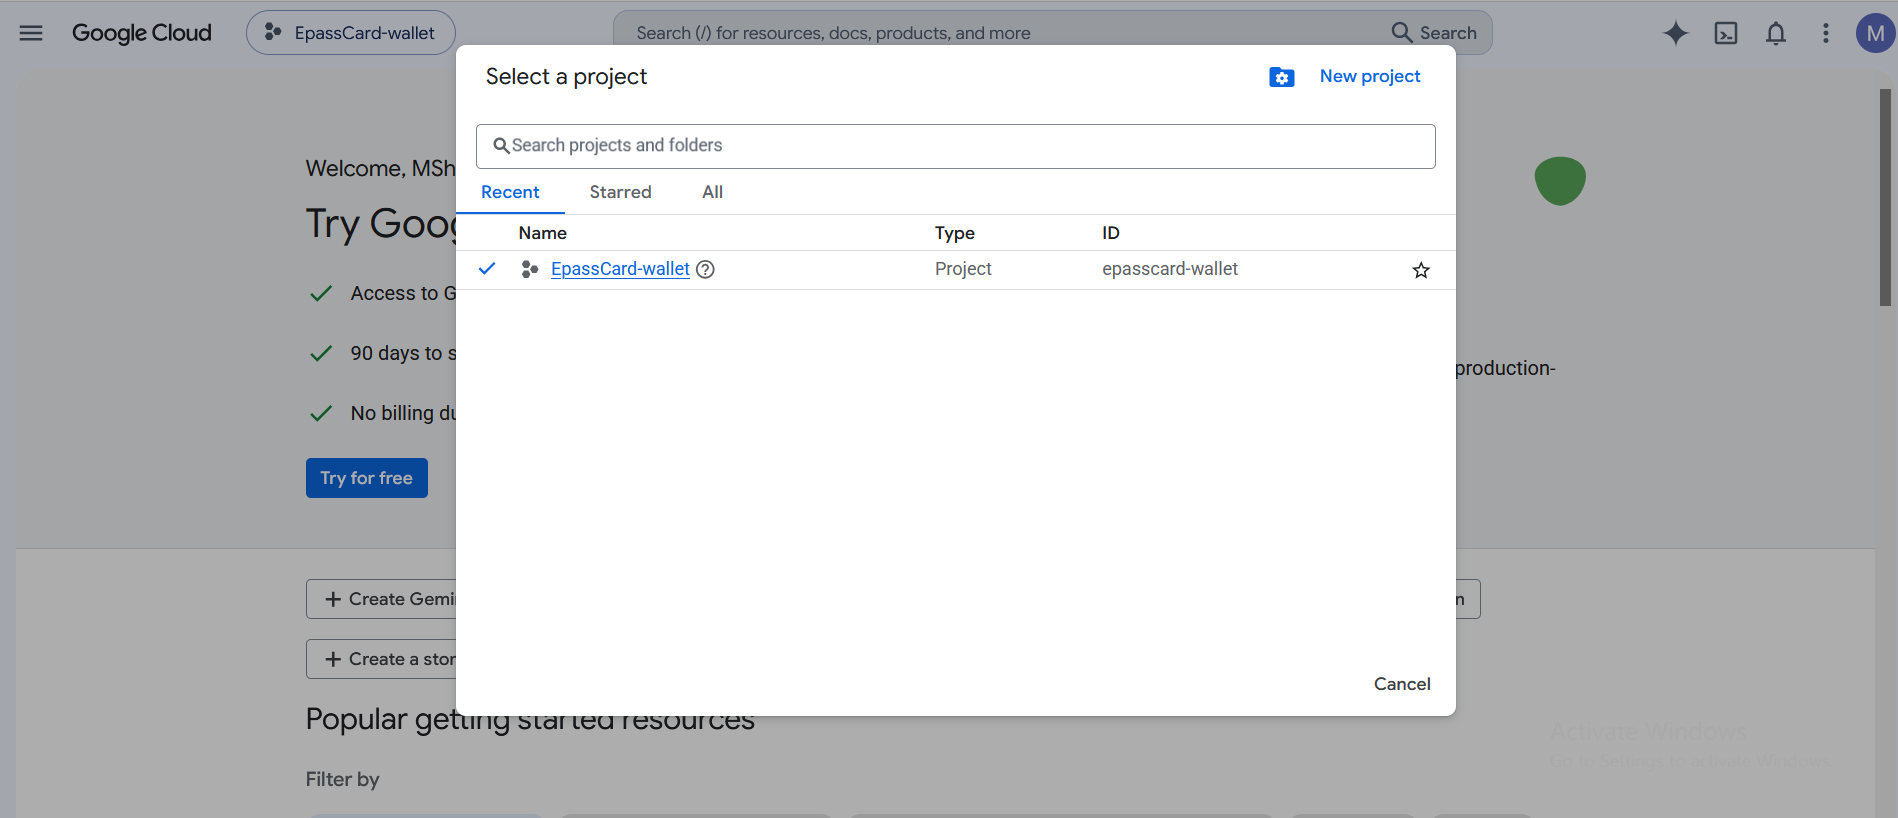
Select or create a Google Cloud project
2Open APIs & Services
- Confirm the correct project is selected in the top bar.
- Click APIs & Services under Quick access (or find it in the navigation menu).
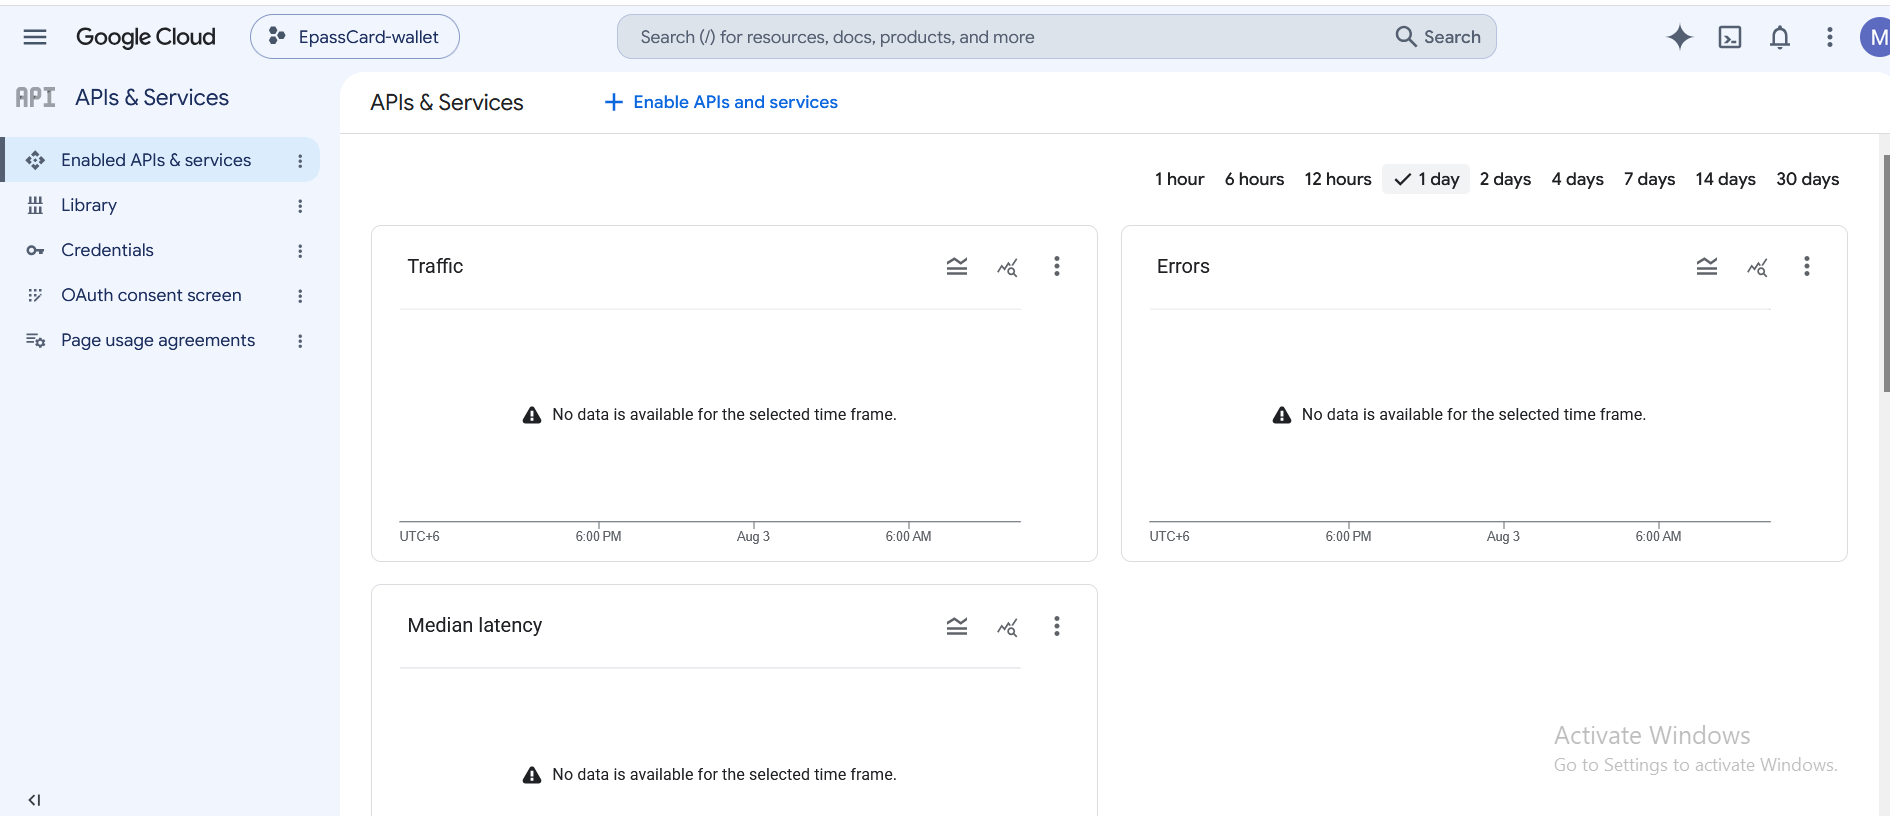
Open APIs & Services
3Open the API Library
- In the left sidebar under APIs & Services, click Library.
- This is where you search for and enable Google products for your project.
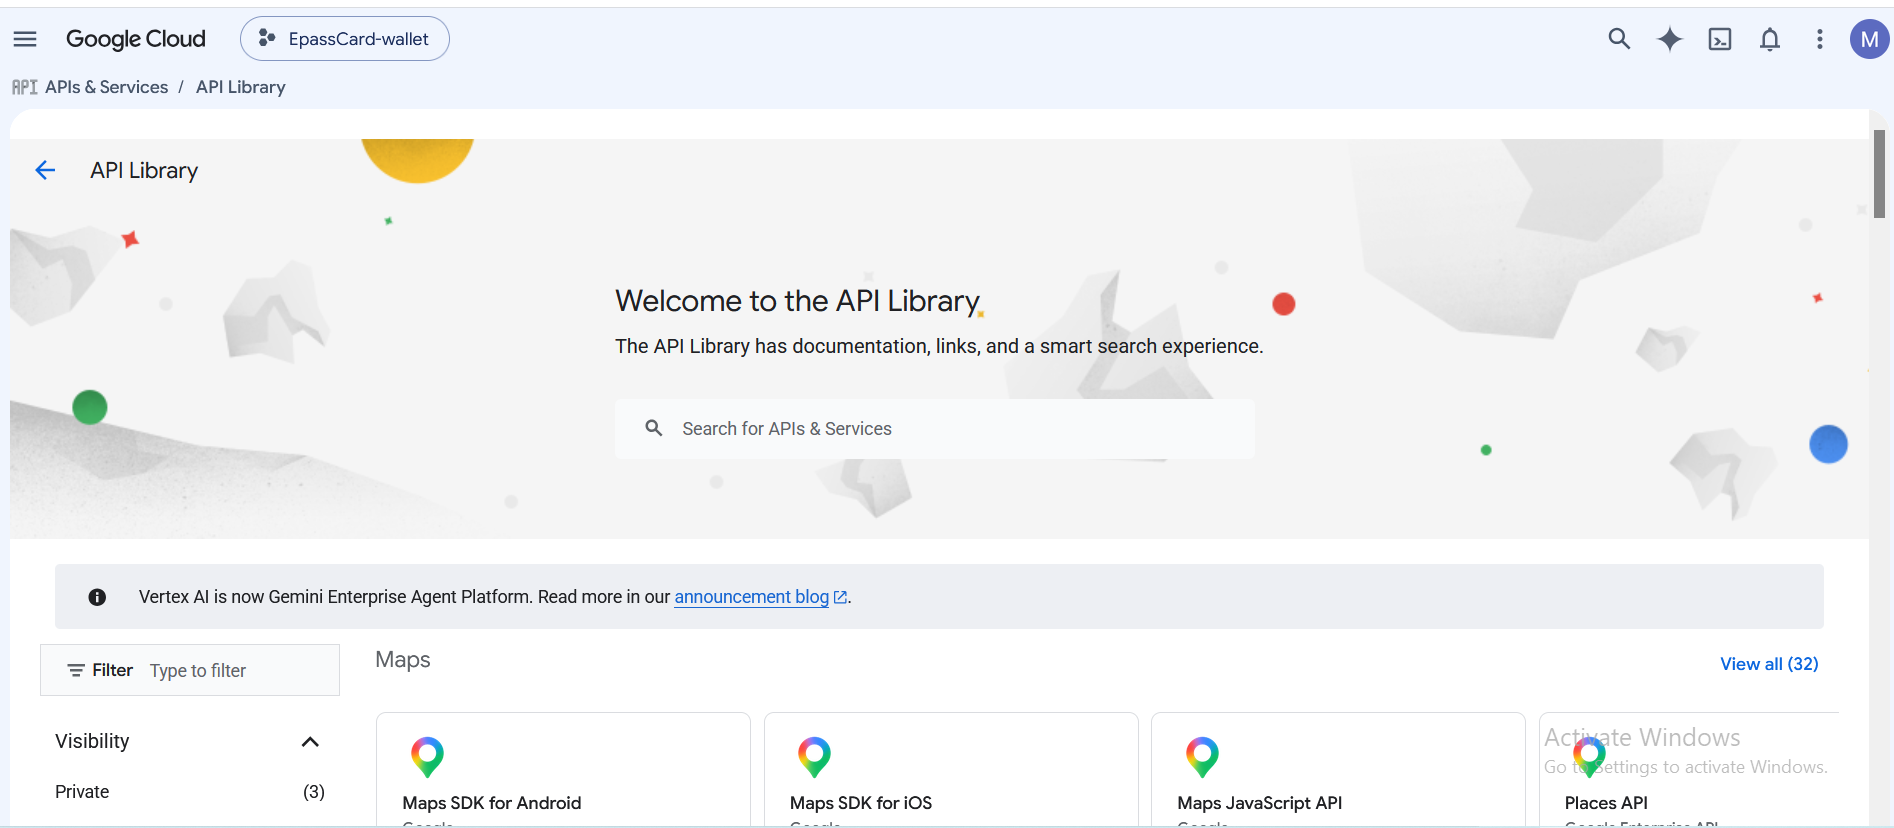
Open the API Library
4Search for Google Wallet API
- In the Library search box, type Google wallet.
- Open the card titled Google Wallet API — Description: API for issuers to save and manage Google Wallet Objects.
- Do not select the "Google Pay & Wallet Developer MCP server API" unless you specifically need that product.
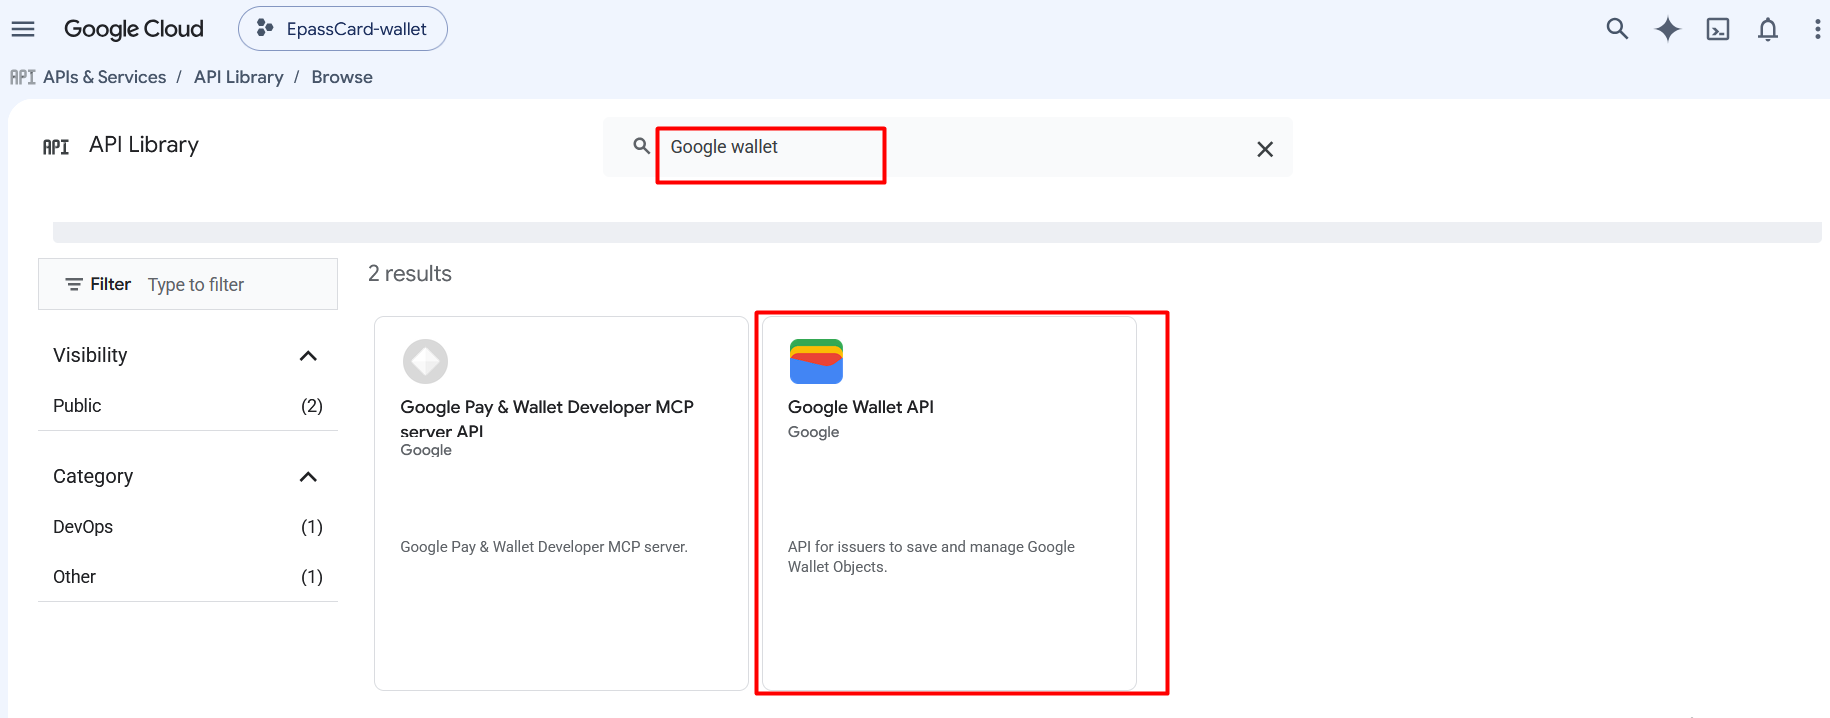
Search and select Google Wallet API
5Enable the API
- On the Google Wallet API product page, click Enable.
- Wait until the page shows the API as Enabled.
- Service name should be
walletobjects.googleapis.com.
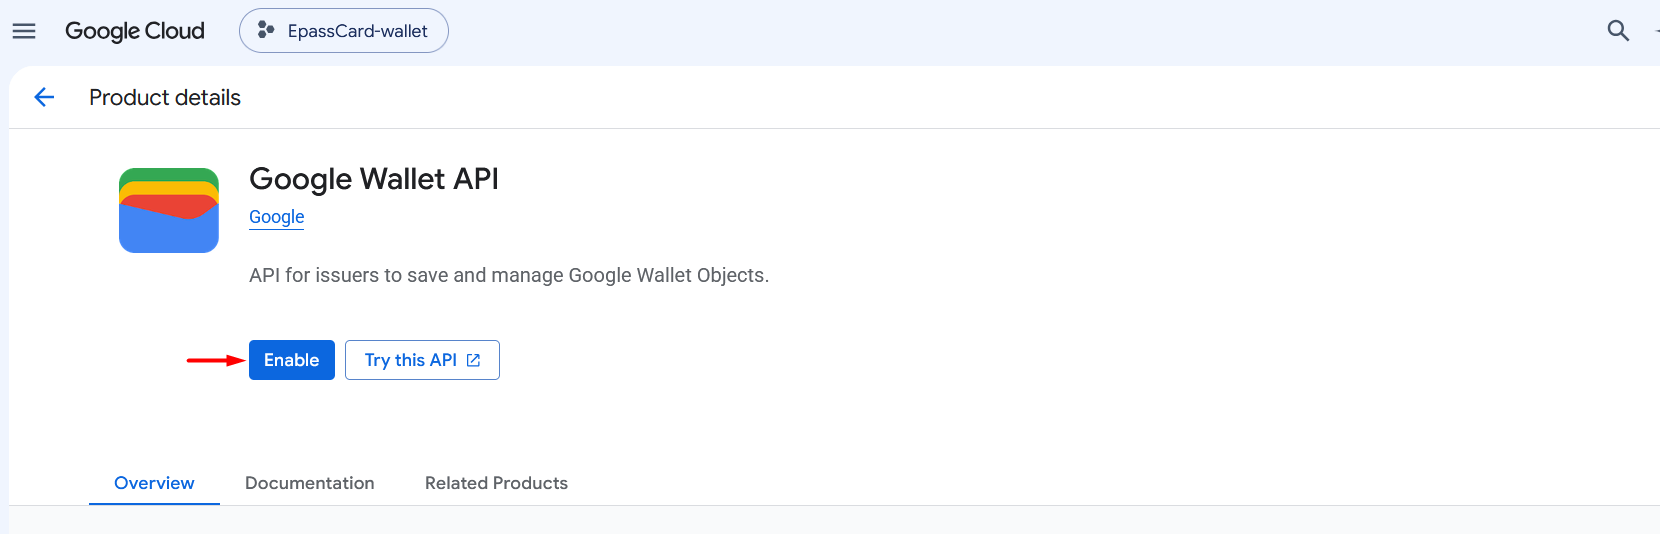
Enable Google Wallet API
Create a service account and JSON key
Google Wallet server-to-server access uses a service account, not a personal OAuth login. EpassCard stores the JSON key encrypted and uses it only to create and update passes for your organization.
6Open IAM & Admin
- Open the main navigation menu (☰).
- Click IAM & Admin.
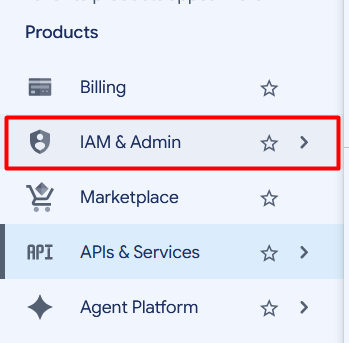
Open IAM & Admin
7Go to Service Accounts
- Under Identity & Access, click Service Accounts.
- You should see the list of service accounts for your project (it may be empty at first).
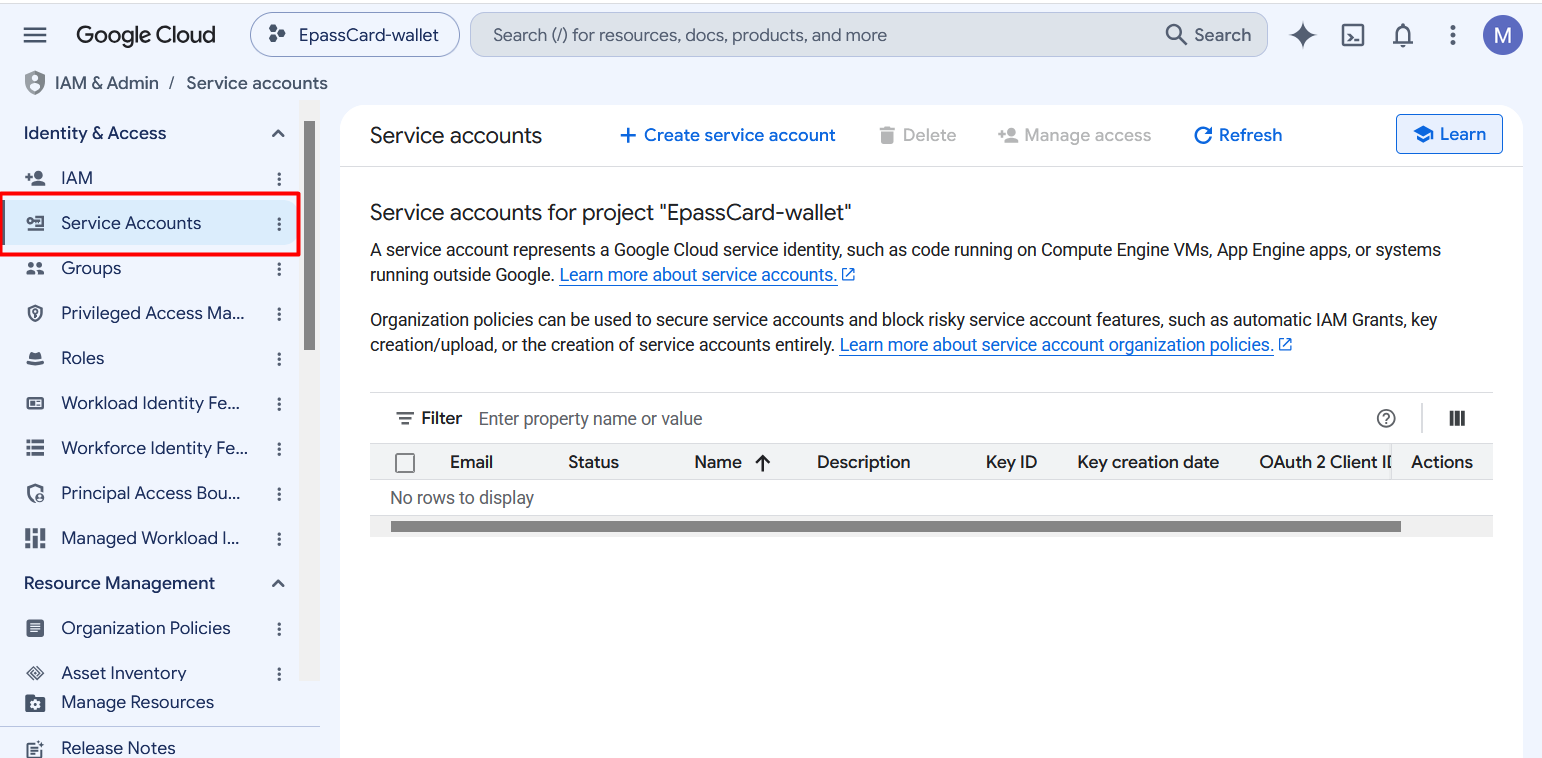
Open Service Accounts
8Create a service account
- Click + Create service account.
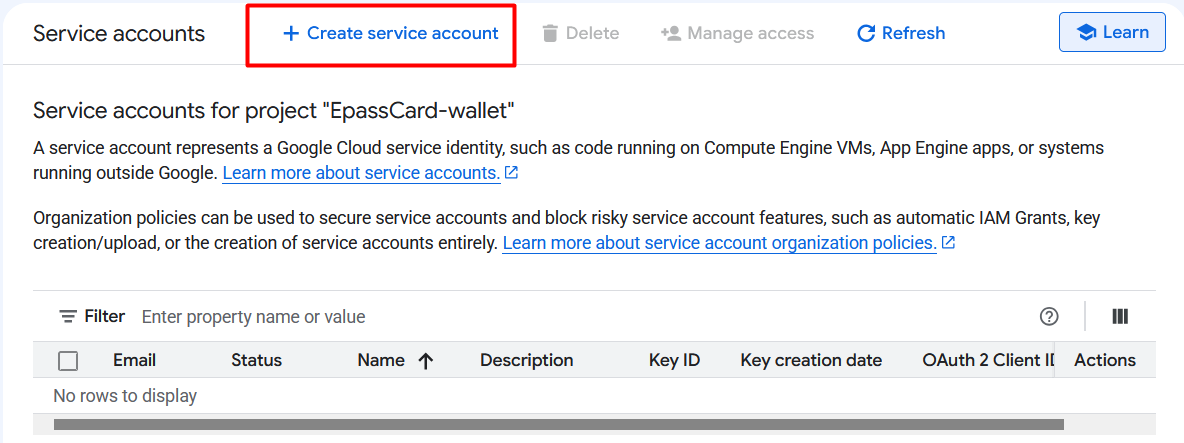
Create service account
9Name the service account
- Enter a clear Service account name, for example:
epasscard-walletorgoogle-wallet-issuer. - Google fills Service account ID and shows the email, like:
epasscard-wallet@YOUR_PROJECT_ID.iam.gserviceaccount.com - Click Create and continue.
- Optional permission steps can be skipped for this Wallet flow — Wallet access is granted later in Pay & Wallet Console.
- Finish creating the account.
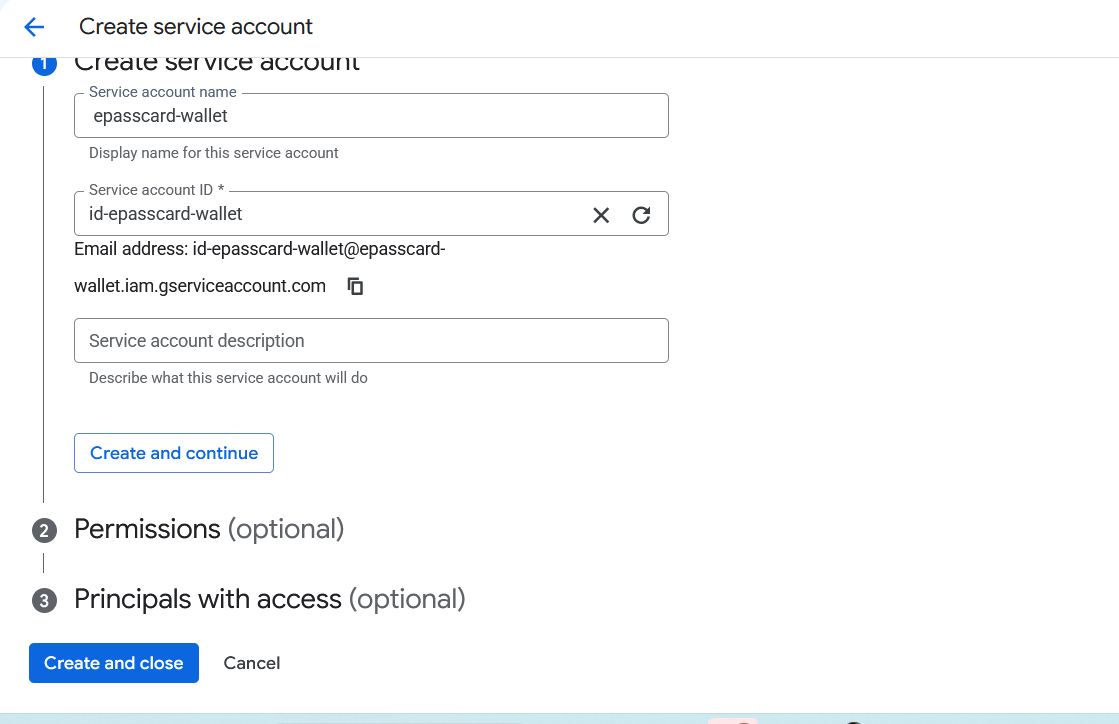
Name the service account
10Copy the service account email
- Return to the Service accounts list.
- Copy the Email value for your new account.
- Keep it handy — you will invite this exact email as a Developer on your Issuer.
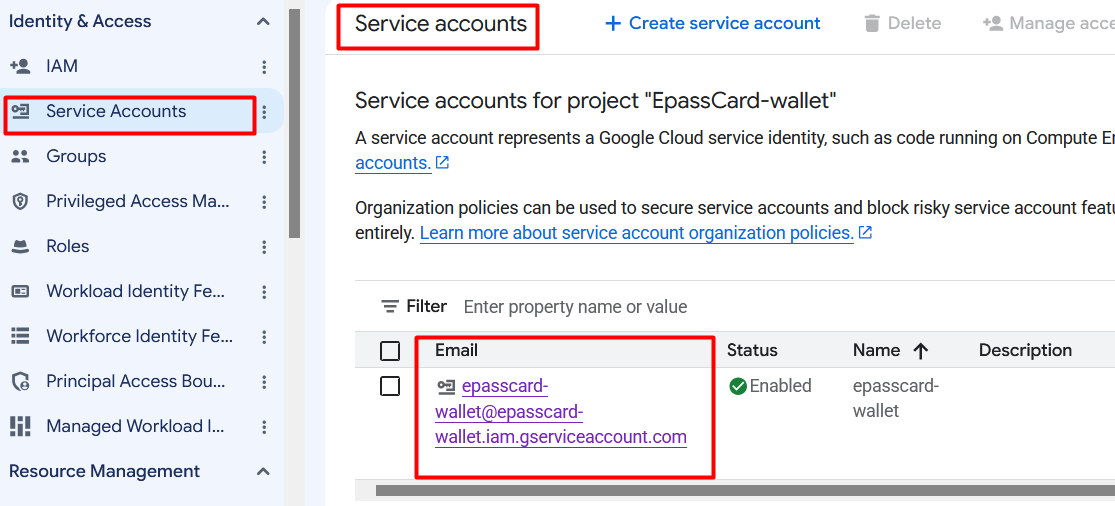
Copy service account email
11Create a new key
- Open the service account.
- Go to the Keys tab.
- Click Add key → Create new key.
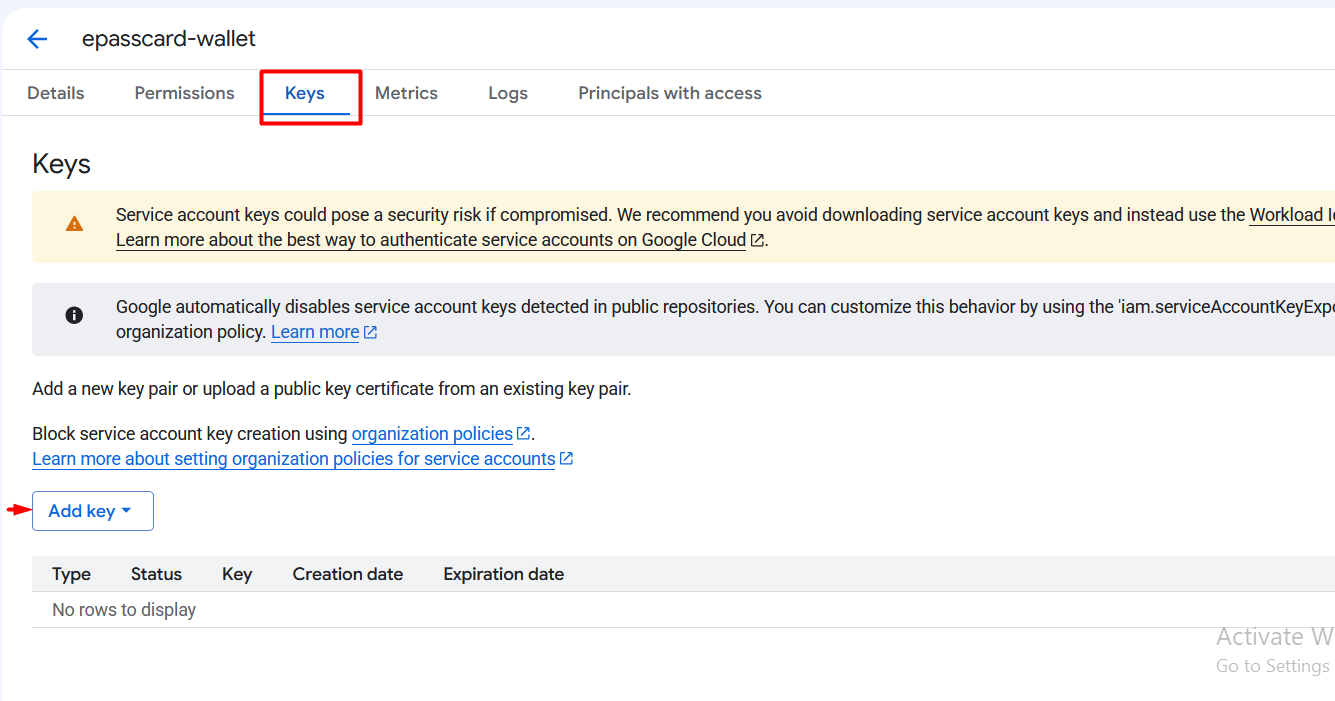
Create a new key
12Download the JSON key
- Choose JSON (recommended).
- Click Create.
- Your browser downloads a
.jsonfile. - Store it securely. Anyone with this file can act as that service account.
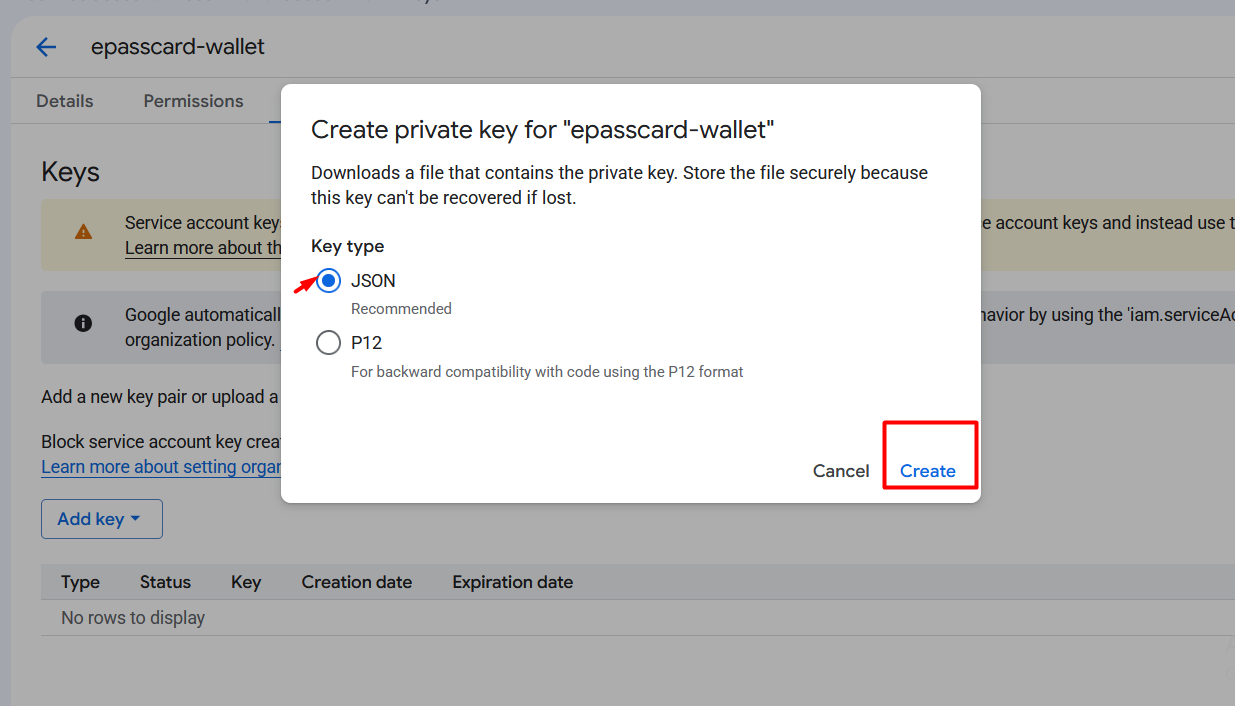
Download JSON key
- Do not commit the JSON file to Git.
- Do not share it in chat or email if you can avoid it.
- In EpassCard, the key is encrypted at rest and never returned in API responses.
- If a key is leaked, delete it in Cloud Console and create a new one, then re-upload in EpassCard.
Connect the Issuer in Google Pay & Wallet Console
13Copy your Issuer ID
- Open Google Pay & Wallet Console.
- Open Google Wallet API.
- At the top of the page, find Issuer ID (long numeric value, for example
3388000000023…). - Copy it carefully — this is not inside the JSON file.
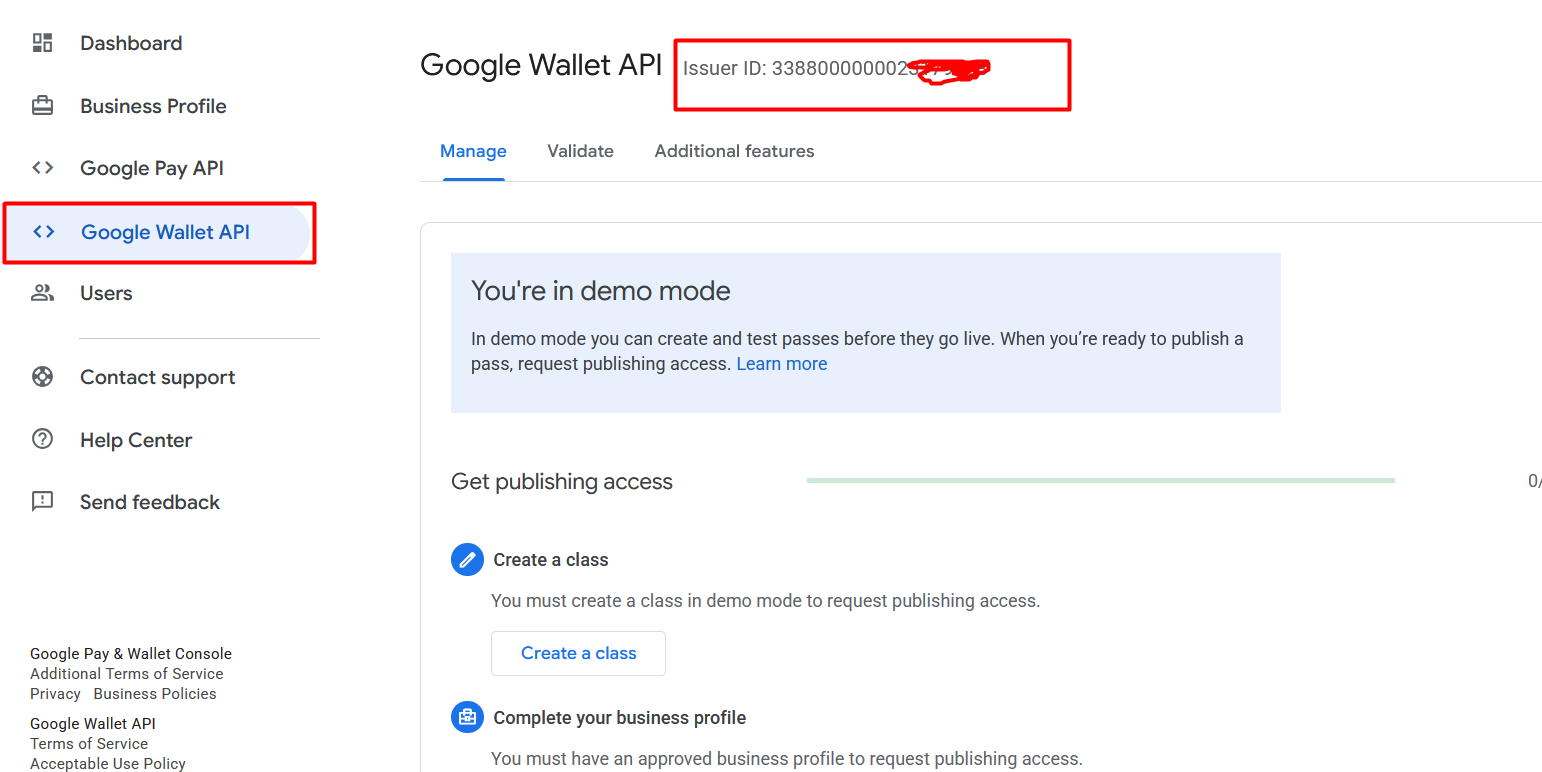
Copy Issuer ID
14Open Users and invite access
- In Pay & Wallet Console, open Users.
- Click Invite a user.
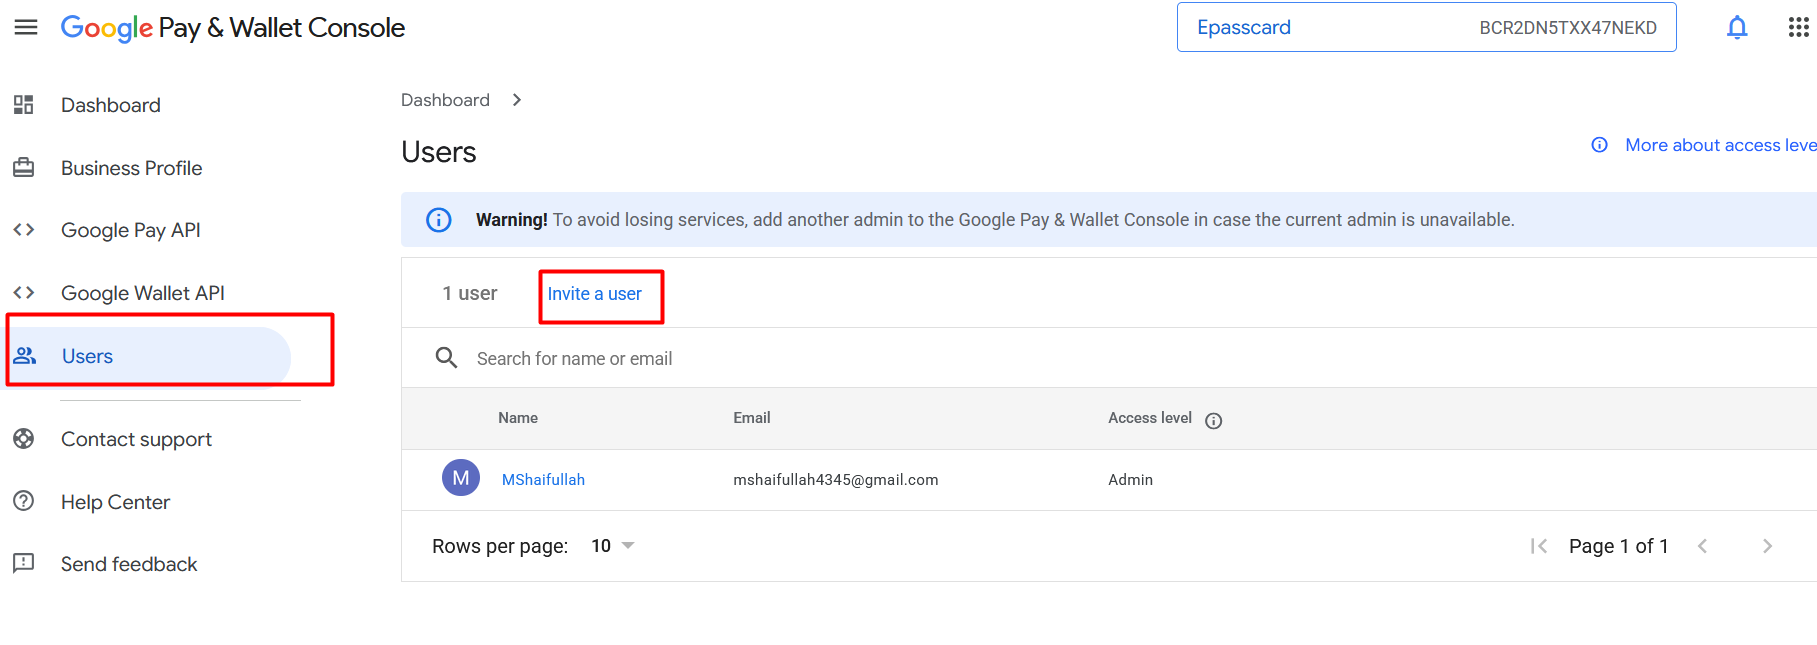
Invite a user
15Invite the service account as Developer
- In the invite dialog, paste the service account email (the
.iam.gserviceaccount.comaddress). - Set Access level to Developer (Admin also works, but Developer is enough for pass creation).
- Click Invite.
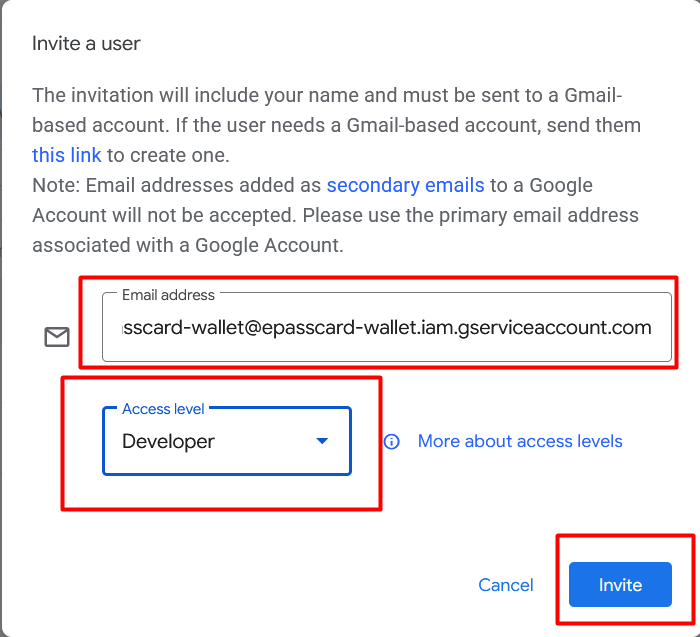
Invite service account as Developer
Upload credentials in EpassCard
16Upload in Certificates → Google Wallet
- Sign in to EpassCard as an org admin.
- Go to Certificates.
- Open the Google Wallet tab.
- Click Upload Google credentials (or follow Tutorials → Google Wallet).
- Paste your Issuer ID.
- Upload the service account JSON file.
- Submit.
- File is a real service account JSON
- Issuer ID format is correct
- Live call to Google succeeds (API enabled + Issuer access)
17Choose the account on a pass template
- Create or edit a pass template.
- Find Google Wallet Account next to the Apple certificate selector.
- Choose one of:
- EpassCard (platform service account) — default
- My organization (your-service-account@…) — your uploaded credentials
- Save the template.
- Create a pass and test Add to Google Wallet.
How EpassCard uses your credentials
| Situation | What is used |
|---|---|
| Template set to platform (default) | Shared platform Google account + platform Issuer ID |
| Template set to organization | Your encrypted JSON + your Issuer ID |
| Org never uploaded credentials | Platform fallback only |
One credential set is stored per organization. All templates that select "My organization" share that Issuer.
Common setup mistakes (and fixes)
| Problem | Symptom | Fix |
|---|---|---|
| Wallet API not enabled | Upload/pass error about enabling the API | Cloud Console → Library → enable Google Wallet API |
| Service account not invited | Permission / access denied | Pay Console → Users → invite SA as Developer |
| Wrong Issuer ID | Access / not found style errors | Copy Issuer ID from Pay Console Wallet API page |
| OAuth client JSON uploaded | "Expected type service_account" | Download a service account key, not an OAuth client |
| Cloud project ≠ Issuer access | Permission errors | Use the SA email invited on the same Issuer you configured |
Checklist
- Google Cloud project created/selected
- Google Wallet API enabled
- Service account created
- Service account email copied
- JSON key downloaded and stored safely
- Issuer ID copied from Pay & Wallet Console
- Service account invited as Developer
- Issuer ID + JSON uploaded in EpassCard
- Pass template set to My organization (if desired)
- Test pass save to Google Wallet ✓
What's next?
Setup alone does not always mean public live passes. New Issuers often remain in demo mode until Google approves publishing access.
→ How to Publish Google Wallet Passes from Demo Mode to LiveIn EpassCard, open: Certificates → Tutorials → Google Wallet
The in-app wizard mirrors these steps with the same screenshots and ends with a required alert about demo mode and publishing.